Sequence and Genome selection
Since MicroScope version 3.13.0, the selection of sequences and genomes is based on a new selector that has been designed to allow interactive and efficient selection of several sequences or genomes in large lists. It features selection based on several criteria and suggestions.
In this section, selection of Genome means that you are going to select the entire organism including all the replicons. Selection of Sequence means that you are going to select the replicon you want to work on. When talking indistinctly of genome or sequence, we use the term object.
Sequences and genomes come either from MicroScope (PkGDB) or from NCBI RefSeq.
There are two kinds of selectors in the platform (the Simple Selector and the Advanced Selector) which are described in the following sections.
Generally speaking a page use either a simple selector or 1 or 2 advanced ones. For instance, the Keywords Search Tool page use a simple selector in single mode and an advanced selector in multiple mode.
However, some pages use several selectors (of any type), using both PkGDB or NCBI RefSeq. For instance, the Gene phyloprofile page uses 4 advanced selectors (2 from PkGDB and 2 from RefSeq).
Simple Selector
This selector is used to select:
a single genome based on the strain name
a single sequence based on the sequence name
It’s similar to the old selector in MicroScope but offers suggestions.
This selector is used in the homepage to select the reference genome and more generally in pages where you must select a reference object for instance:
Pattern Searches (for Sequence Selection)
Lineplot (for Sequence Selection)
Integration with Genome Carts
Note that the content of your favourite cart (if any) will always show up first in this selector.
How to use it?
When the page opens, the selector is displayed like this (it may take some time to load):

Note that the exact appearance of this selector may depend on the page.
This selector is also used in the top right corner of some pages in Genome Selection mode coupled with a replicon selector for instance in the Genome Browser as shown below.
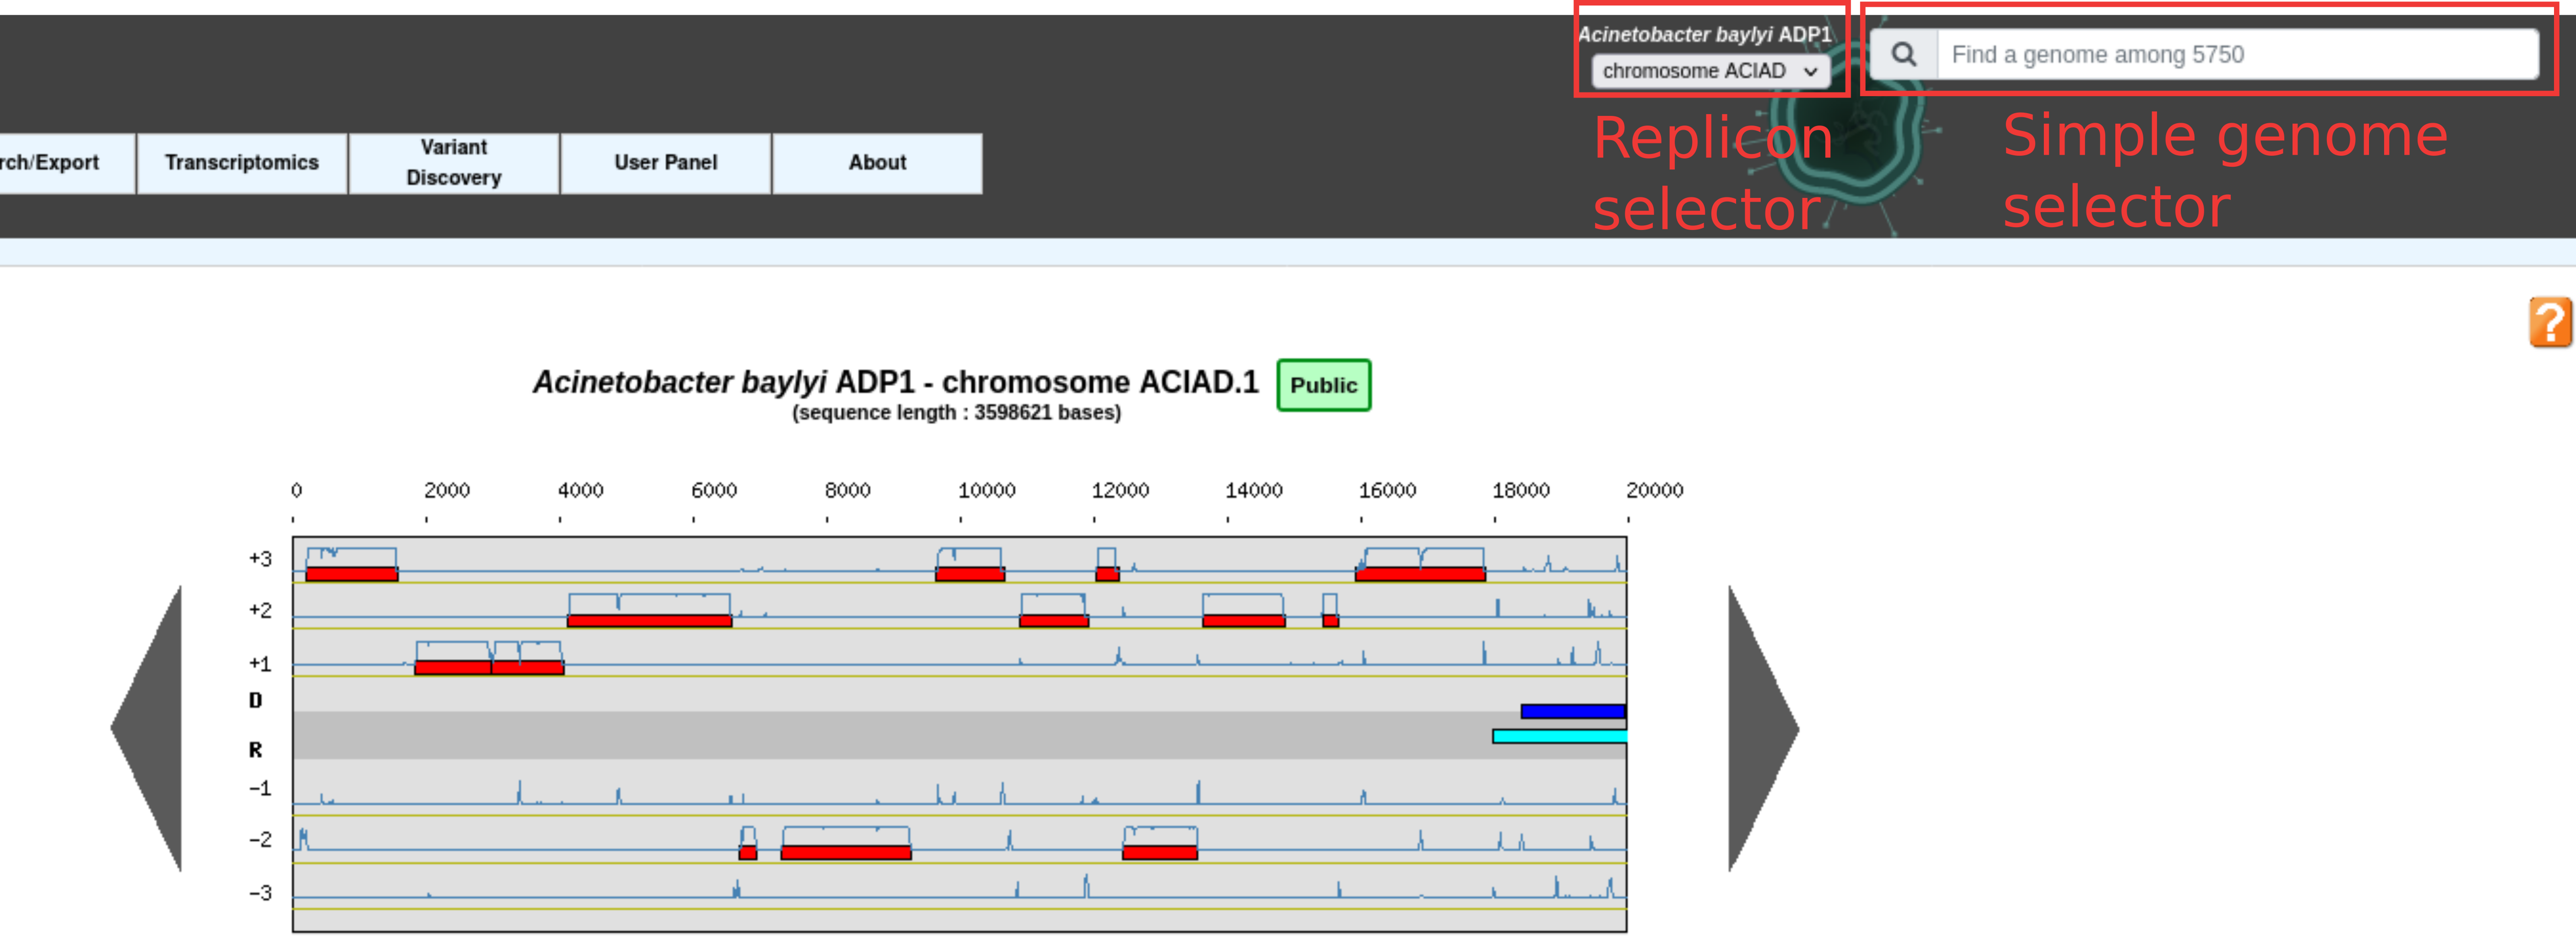
This allows to quickly change the reference genome and the replicon.
Example
To select a reference genome on the home page, type in some characters of its strain name. A list of genomes matching this characters will open. From this list, you can select the genome you want.
For example, if you type “escher”, the following list will open:
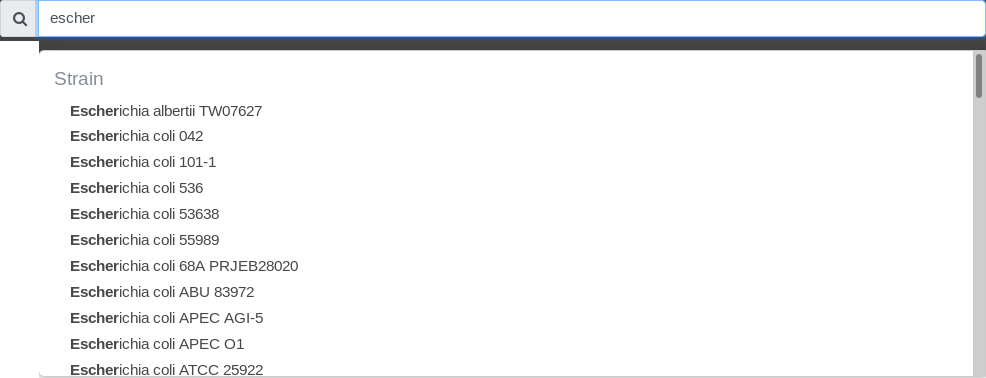
Note that the search is case-insensitive.
Also you can type any character (not just the beginning). For example, if you type “k12”, the following list will open:

Advanced Selector
This selector is used to select one or several objects based on a combination of search.
This selector is used for instance in the following pages:
Blast Searches (for Sequence Selection)
Genome Clustering (for Genome Selection)
Gene phyloprofile (for Genome Selection and Sequence Selection)
Integration with Genome Carts
Genome Carts (including Magic carts) are integrated in the advanced selector in two ways:
First, you can use them as a search criteria (see below). This allows to quickly preselect the content of one or several carts based on their names.
Second a quick selector allows to directly select the content of a cart without opening the selector.
Note that the « magic » carts are always displayed last.
Overview
When the page opens, the selector is displayed like below (it may take some time to load):
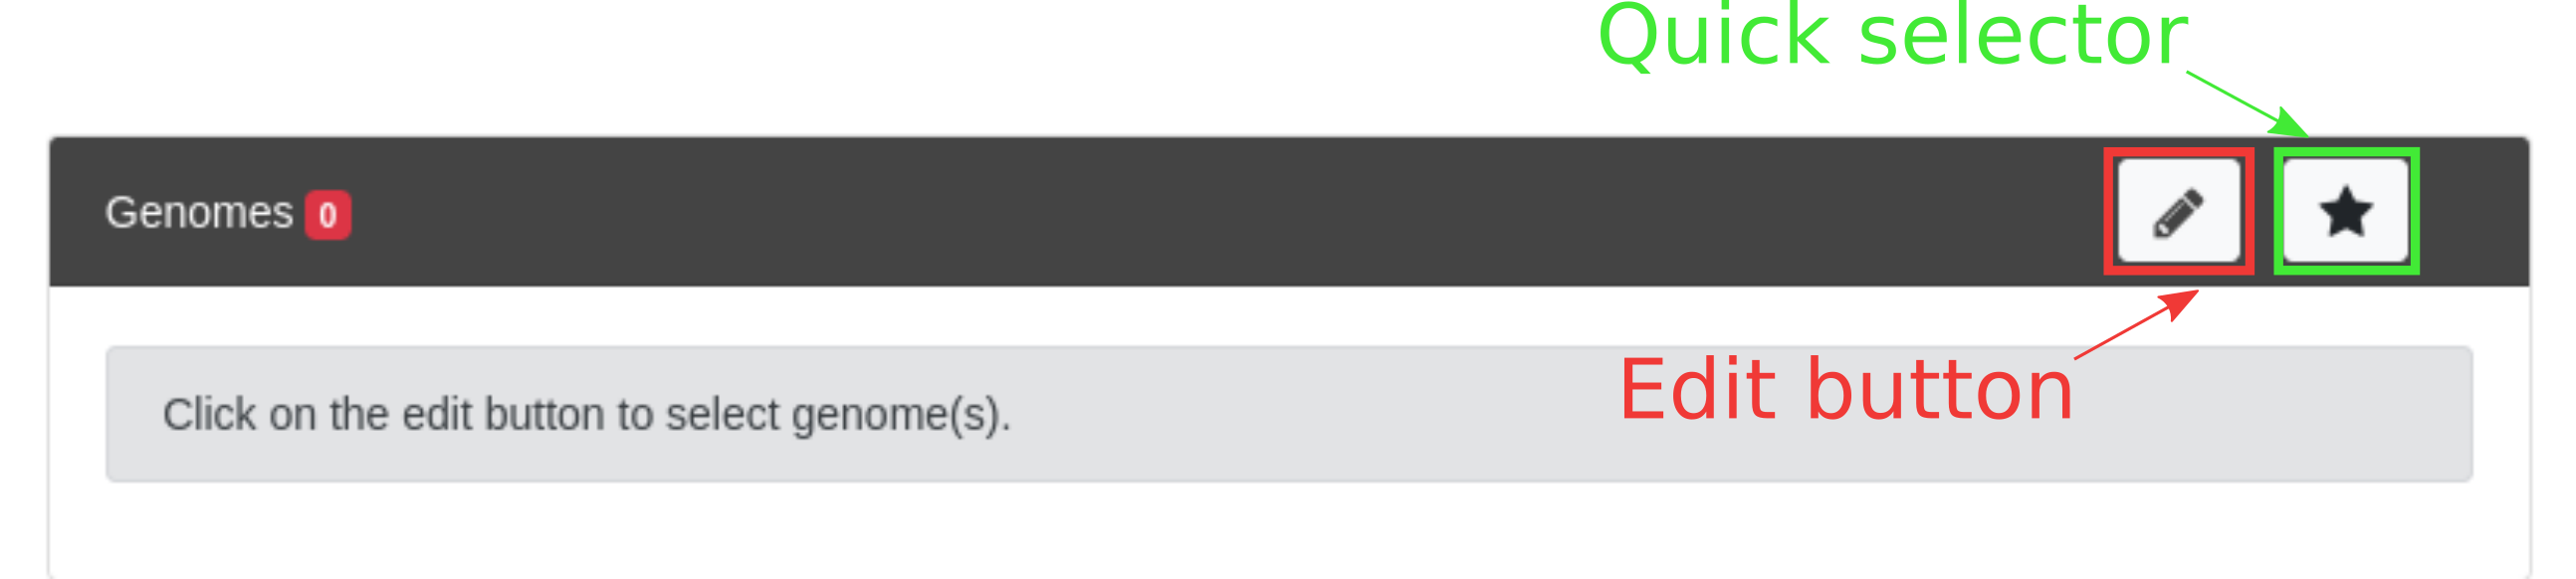
To select genomes you can either use the Quick selector or use the Edit button. Those 2 methods are described below.
Quick selector
The quick selector is a way to select the content of a Genome Cart (including the magic carts). Clicking on the Quick selector will open a popup as below:

From this, you can select a Genome Cart and click Load. Clicking Cancel will close the popup without changing the content.
If a cart is too large or too small for a given selector, you won’t be able to select it with the Quick selector.
Edition
To start selecting objects click on the Edit button. The selector opens as shown below:
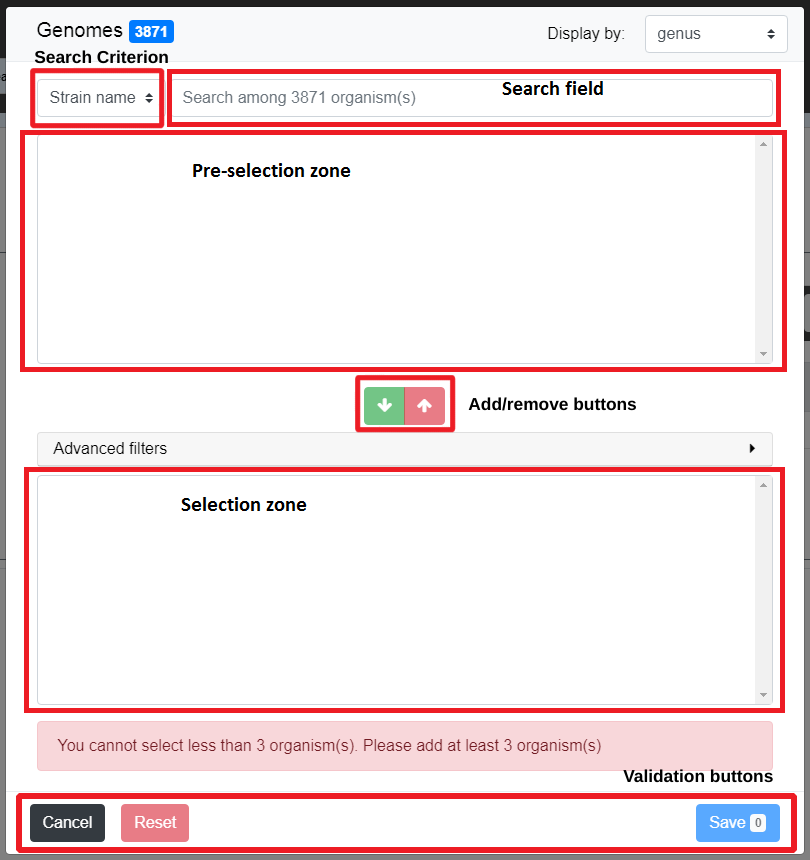
The window is divided in 5 parts:
the Search Criterion and Search Field are used to create filters on the list of objects from the data source; see The search field and the filters for detailed explanation on those fields
the Pre-selection Zone is used to select objects among the filters results
the Selection Zone shows the list of currently selected objects
the Add/Remove buttons allows to transfer objects between the Pre-selection Zone and the Selection Zone
The general usage of the selectors is as follows. You can use the Search Criterion and Search Field to filter the list of all objects from the data source.
Filters can be constructed from:
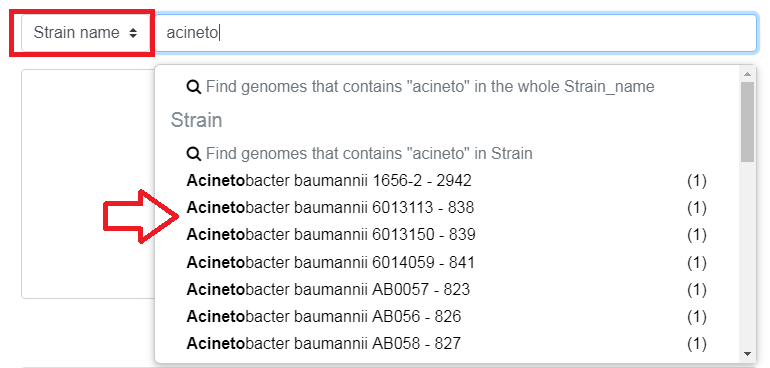
the Strain name when selecting a genome or the Sequence when selecting a sequence
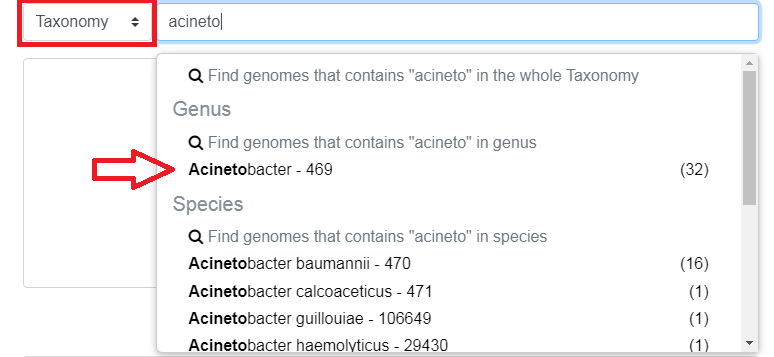
the Taxonomy of the object
the MICGC to which the object belong (see Genome Clustering)
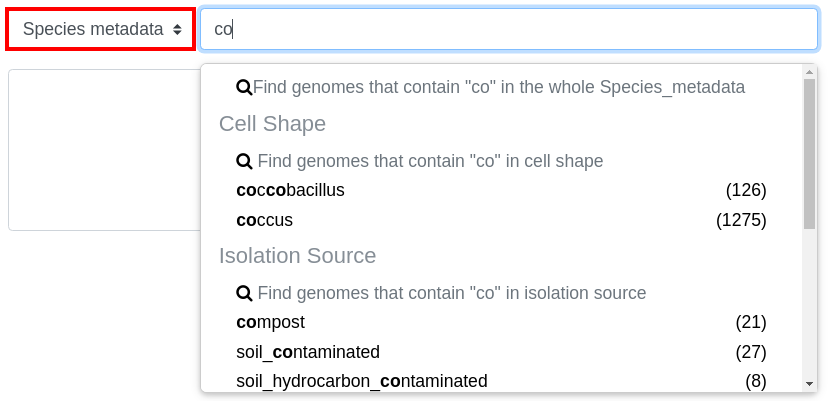
some Metadata about the species of the object (see Species metadata)
the name of your Genome Carts
See The search field and the filters for detailled explanation on filters.
The Pre-selection Zone will display the objects that match the filters. You can then select objects from this list and add them to the Selection Zone with the Add Button (green arrow).
If you want to remove objects from the Selection Zone, select them and use the Remove Button (red arrow). See The selection zone to learn more about the Selection Zone (including the use of filters in it).
You can use the Pre-selection Zone several times with different filters. This allows to create more complex selections.
When satisfied with the list in the Selection Zone, click on Save. The selection window will close and you will return to the page you are interested in for further analysis.
The Reset button will revert both zones (Selection Zone and Pre-selection Zone) to their initial value (i.e. when the page was opened). The selection window stays open so you can restart the selection.
The Cancel button button cancels all the changes done in the current selector (i.e the list of selected objects is not changed) and closes the selection window.
Example
In this example, will we show how to use the advanced selector to select some genomes from the phylum Actinobacteria and whose strain name contains some characters.
If you want to select sequences, the procedure is similar (the main difference being that the Search Criterion contains Sequence and not Strain name).
Select by taxonomy
The first step is to filter genomes in the Actinobacteria phylum. To do so, open the selector and select Taxonomy in the Search Criterion. Then type “actinobacteria” in the Search Field. You will notice that suggestions are shown as you are typing.

Filters are shown in the drop down list. In taxonomy mode, filters can operate on any taxonomic level. Click on “Actinobacteria”.
The list of all genomes in the Actinobacteria phylum is now in the Pre-selection Zone.
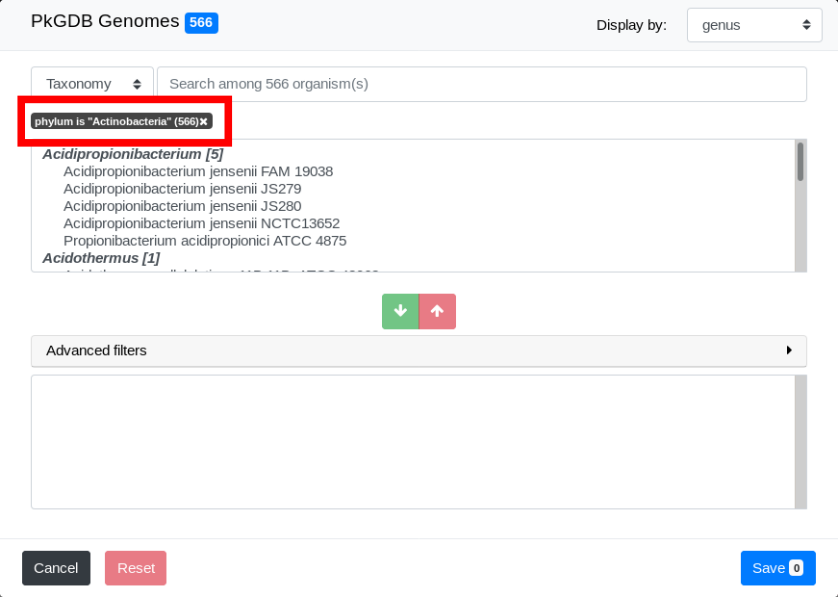
Note that the filter and the number of genomes filtered appear on the interface. In this example, we have specified the phylum exactly. Hence the filter is “phylum is ‘Actinobacteria’”. See The search field and the filters for more detailled explanations.
By default, genomes are grouped by Genus. Use the “Display by” menu to group by phylum.

Select by strain name
We will now select genomes whose strain name contains “bifi”. To do so, select Strain name in the Search Criterion and type “bifi” in the Search Field.
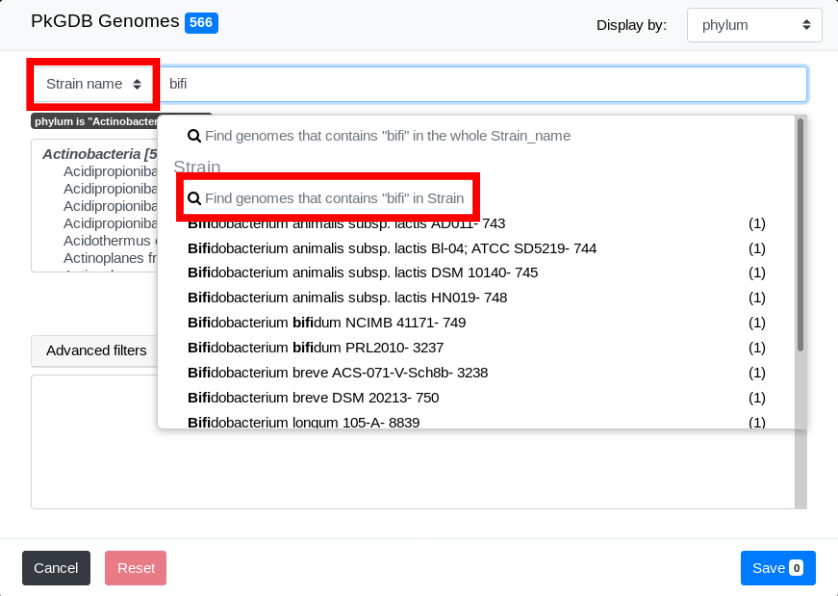
The list of genomes that match both filters is displayed:
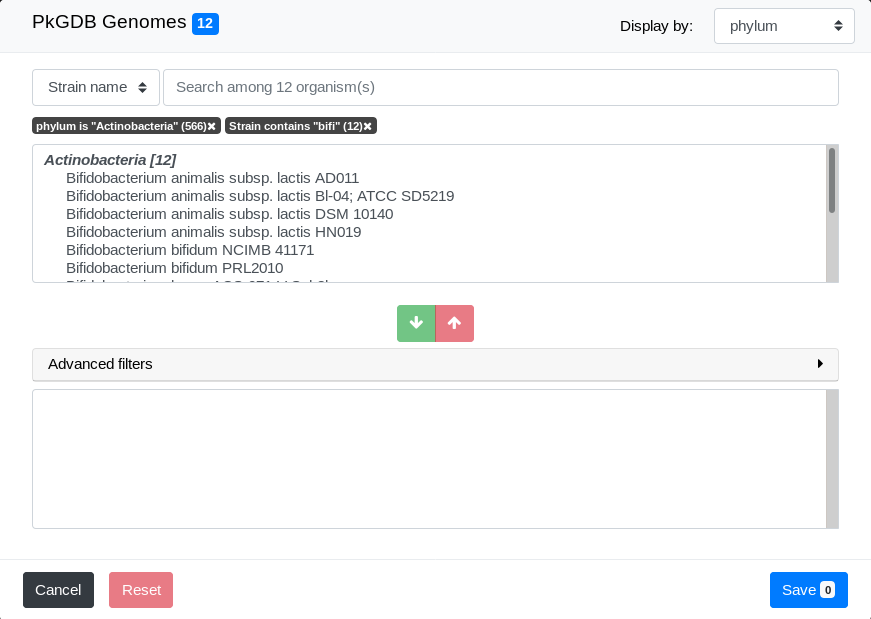
Final selection
We can now select some genomes from the filtered list in Pre-selection Zone. To do so, simply select one of them by clicking on it and click on the Add Button.
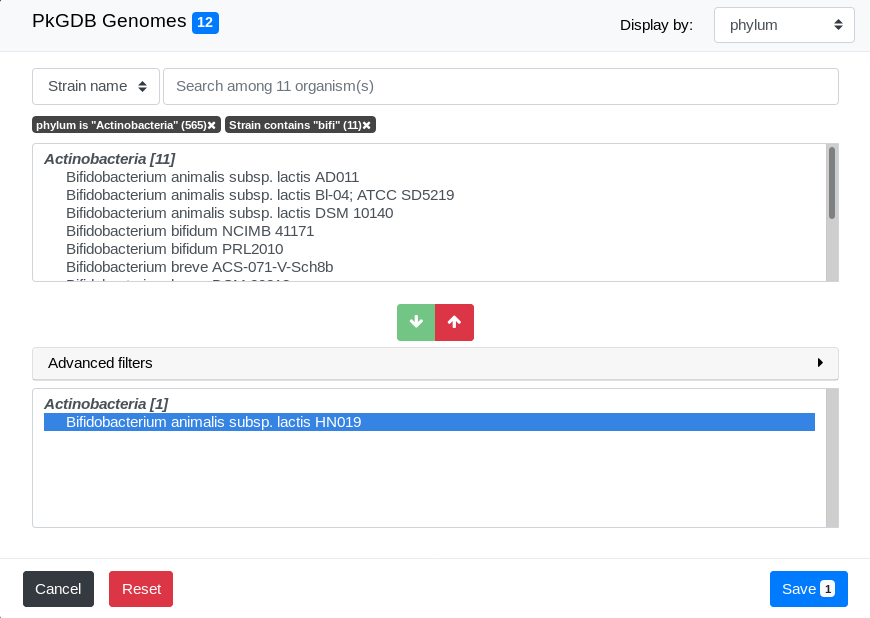
As you can see, the number of genomes in the Pre-selection Zone is updated. See How to select objects of interest? for a detailled description of how to select them.
Congratulations, you have made your first advanced selection in MicroScope ! The rest of this page explains some details about the advanced selector.
Detailed description
The search field and the filters
The Search Criterion allows to choose on which aspect you want to filter. Typing in the Search Field, will bring suggestions.
Strain name/Sequence filters by name of genome/sequence
Taxonomy filters by taxonomic (NCBI based) information
MICGC filters objects in a MICGC (see Genome Clustering)
Species metadata filters by metadata about the species of the object
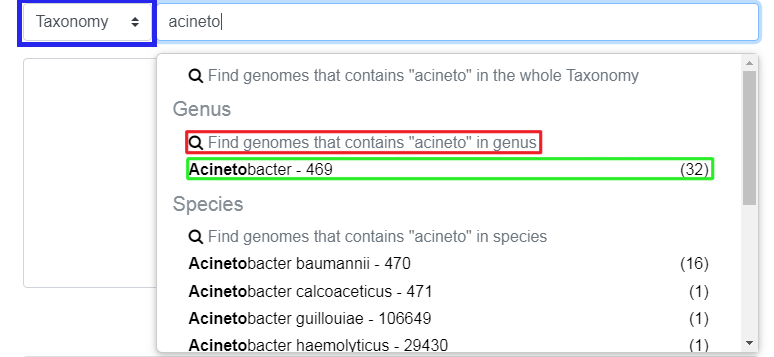
Those suggestions are in fact filters. There are 2 kinds of filters:
partial filter (shown in red in the image below): the genus must contain “Acinetobacter”
exact filter (shown in green in the image below): the genus must be exactly “Acinetobacter”
Pressing enter at any time in the Search Field creates partial filter.
Clicking on a filter will add it.
You can add several filters to improve the accuracy of your pre-selection.
To remove a filter, click on the little “x” next to its name.
What is the display menu?
By default, objects in the Pre-selection Zone and Selection Zone are grouped by genus. You can change this by modifying the value of the display drop down menu.
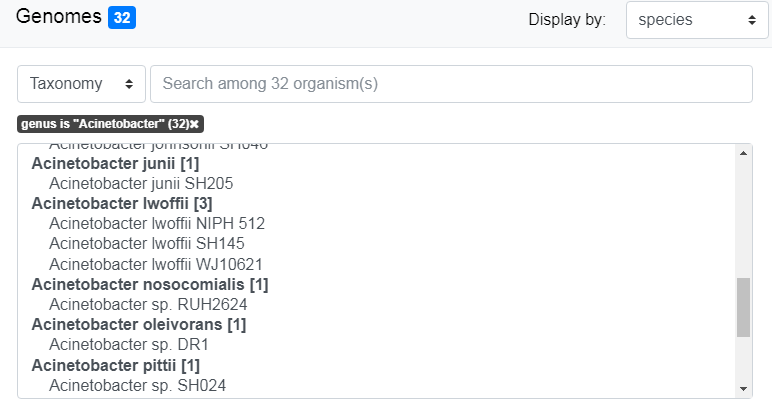
The display by “species” with “Acinetobacter” filter active will organize all pre-selected genome by species.
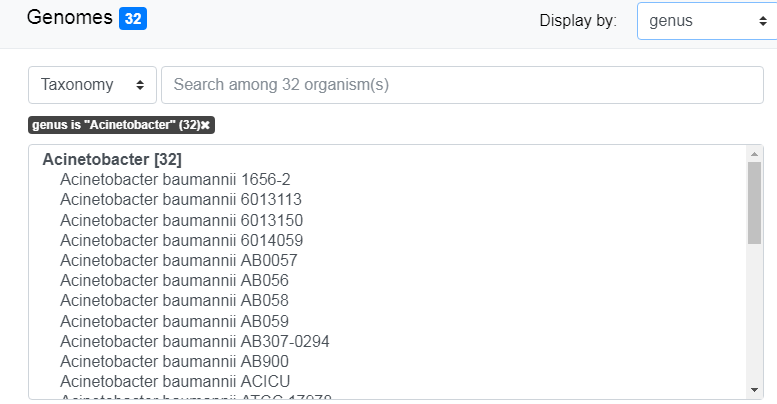
The display by “genus” with “Acinetobacter” filter active will show all the 32 genomes in one single group.
How to select objects of interest?
To select an object, move the mouse with the button down on the wanted genomes in the Pre-selection Zone (shift + click works too). Then press the green button to put them in the Selection Zone.
Tip
You can select the group of genome/sequence by double clicking on the bold tittle inside the Pre-selection Zone.
The selection zone
The Selection Zone is there to allow you to see all the selected object for the analysis. You can remove some of them by moving the mouse with the button down and pressing the red button to remove them from the Selection Zone. If the active filter allow them, they will appear in the Pre-selection Zone.
When you are satisfied with your selection, press the save button to continue the analysis.
What is “Advanced filter”?
This part allow you to make filter in the Selection Zone to remove objects more efficiently. It works exactly the same as the first search field.